Showing posts with label #serverless. Show all posts

Sunday, May 10, 2026

Mastering Serverless Security: A Guide to AWS IAM and Resource-Based Policies

Mastering Serverless Security: A Guide to AWS IAM and Resource-Based Policies

In the world of Serverless Architecture, security is often treated like a final coat of paint—something applied at the very end of a project. However, in an Event-Driven Architecture, security must be the foundation. When your application consists of dozens of independent AWS Lambda functions talking to various services, managing "who can do what" becomes your most important task.

Think of AWS IAM (Identity and Access Management) as the security guard of a high-end hotel. Identity-based policies are like the keycard given to a guest, specifying which floors they can access. Resource-based policies, on the other hand, are like the guest list at a private lounge—it doesn’t matter if you have a general keycard; if your name isn't on the specific lounge list, you aren't getting in.

In this guide, we will explore how to secure your AWS Architecture by moving beyond generic permissions and mastering the interplay between identity and resource policies, especially in complex cross-account scenarios.

Understanding the Two Pillars of Serverless Security

To build a secure Cloud Computing environment, you must understand the two primary ways AWS handles permissions:

Identity-Based Policies

These are attached directly to a user, group, or role. In a serverless world, this is almost always your Lambda Execution Role. It defines what that specific function is allowed to do (e.g., "This Lambda can read from a DynamoDB table").

Resource-Based Policies

These are attached directly to a resource, such as an S3 bucket, an SNS topic, or even another Lambda function. These policies define who has permission to access that specific resource.

The real power of resource-based policies is revealed in cross-account access. If a Lambda function in "Production Account A" needs to drop a file into an S3 bucket in "Storage Account B," an identity-based policy alone isn't enough. The S3 bucket itself must have a resource-based policy that explicitly trusts the Lambda from the other account.

Architecture: Cross-Account Permission Flow

Before we look at the code, let's visualize how these permissions interact in a cross-account environment.

In this scenario:

  • Lambda (Account A): Has an Identity-based policy allowing it to perform s3:PutObject.
  • S3 Bucket (Account B): Has a Resource-based policy (Bucket Policy) that allows the specific ARN of the Lambda in Account A to perform that action.
  • AWS Evaluation: AWS checks both. For cross-account access, both the identity and the resource must explicitly grant permission. If either says "no," the request is denied.

Practical Walkthrough: Moving to Least Privilege

The biggest security risk in Serverless is the "Star (*) Resource" trap—giving a function AdministratorAccess or allowing it to touch all resources because it's easier than writing a specific policy.

Using the Serverless Framework, let's look at how we transition from a risky configuration to a secure, "Least Privilege" setup.

The "Before" Snippet: High Risk

This common pattern uses wildcards, allowing the Lambda to delete any object in any bucket in your account.

# serverless.yml (High Risk)
functions:
  uploadProcessor:
    handler: handler.upload
    iamRoleStatements:
      - Effect: Allow
        Action:
          - "s3:*"
        Resource: "*" # Dangerous: Allows access to everything

The "After" Snippet: Least Privilege

This version limits the action to only PutObject and restricts it to a specific bucket ARN, even across accounts.

# serverless.yml (Secure)
functions:
  uploadProcessor:
    handler: handler.upload
    iamRoleStatements:
      - Effect: Allow
        Action:
          - "s3:PutObject"
        Resource: "arn:aws:s3:::cross-account-storage-bucket/*"

Node.js Implementation with AWS SDK v3

When writing your handler, using the AWS SDK v3 ensures you are following modern standards. The SDK will automatically use the permissions from your IAM role to sign the request.

import { S3Client, PutObjectCommand } from "@aws-sdk/client-s3";

const s3Client = new S3Client({ region: "us-east-1" });

export const handler = async (event) => {
  const params = {
    Bucket: "cross-account-storage-bucket",
    Key: "secure-report.json",
    Body: JSON.stringify({ message: "Securely uploaded!" }),
  };

  try {
    const data = await s3Client.send(new PutObjectCommand(params));
    console.log("Success:", data);
  } catch (err) {
    // CloudWatch will capture this if permissions fail
    console.error("Access Denied or Error:", err.message);
    throw err;
  }
};

Auditing and Monitoring Your Security

Even with the best intentions, IAM policies can become "bloated" over time. This is where specialized tools come in.

AWS IAM Access Analyzer

A standout feature for any serverless developer is IAM Access Analyzer. It works by scanning your resource-based policies to alert you if any of them allow access from outside your account or organization. This is your "safety net" to ensure you haven't accidentally made a bucket public or shared a sensitive Secrets Manager key with the entire world.

The Role of CloudTrail and CloudWatch

While Access Analyzer helps with configuration, AWS CloudTrail is your auditor. It records every single API call made in your account. If a Lambda function tries to access a resource it shouldn't, CloudTrail provides the "who, what, and when."

Pair this with Amazon CloudWatch Logs to create metrics for AccessDenied errors. If you see a spike in these errors, it's a leading indicator that either your application is misconfigured or someone is attempting to probe your architecture for weaknesses.

Best Practices and Common Pitfalls

Best Practices

  • Grant Least Privilege: Only give the permissions necessary to perform the task.
  • Use Conditions: Add Condition blocks to your policies (e.g., only allow access if the request comes from a specific VPC).
  • Automate Audits: Turn on AWS Config and IAM Access Analyzer to catch drift in your security posture.

Common Mistakes

  • The Confused Deputy: This happens when a service with broad permissions is tricked into acting on behalf of an unauthorized user. Always use the ExternalId or SourceArn conditions in your trust policies to prevent this.
  • Over-reliance on Managed Policies: AmazonS3FullAccess is easy, but it's almost always too much power for a single function.

Conclusion

Enhancing security in Serverless Architecture isn't about one single setting; it's about the layers of defense you build using AWS IAM and resource policies. By understanding the relationship between the "keycard" (Identity) and the "guest list" (Resource), you can build complex, cross-account systems that are both powerful and incredibly secure.

Start by auditing your current functions today—replace those * wildcards with specific ARNs, and let tools like Access Analyzer keep watch while you build.

#AWS #Serverless #CloudSecurity #IAM #AWSLambda #CloudComputing

Saturday, February 7, 2026

Rotating Secrets in AWS Secrets Manager Using AWS Lambda

 Rotating Secrets in AWS Secrets Manager Using AWS Lambda

When building applications in the cloud, one of the most common security mistakes is hardcoding credentials or leaving them unchanged for long periods. It might work during development, but in production, static credentials become a serious risk.

Imagine this scenario:
Your application connects to a database using a username and password stored in environment variables. Months pass, teams change, logs get shared, and suddenly someone realizes the credentials have never been rotated.

This is exactly the type of problem AWS Secrets Manager is designed to solve. It not only stores secrets securely, but also allows you to automatically rotate them using AWS Lambda.

In this guide, we’ll walk through a beginner-friendly, practical approach to rotating database credentials using AWS Secrets Manager and AWS Lambda with Node.js.

Automated Secret Rotation with AWS Lambda

Importance of Secret Rotation

Before jumping into implementation, let’s understand why secret rotation is important.

Risks of Static Credentials

  • Credentials may be exposed in logs or code.

  • Old credentials may still work after employees leave.

  • Compromised credentials may remain valid indefinitely.

Benefits of Automatic Rotation

  • Credentials change periodically.

  • Reduced blast radius in case of compromise.

  • No manual intervention required.

  • Fully managed and auditable.

AWS Secrets Manager automates this process by integrating with Lambda functions.

AWS Secret Rotation Mechanism

When you enable rotation in AWS Secrets Manager:

  1. AWS triggers a Lambda function.

  2. The Lambda performs the rotation logic.

  3. Secrets Manager manages secret versions.

AWS follows a four-step rotation process:

  1. createSecret: Generate new credentials.
  2. setSecret: Apply new credentials to the database.
  3. testSecret: Verify the new credentials work.
  4. finishSecret: Mark the new version as active.

Your Lambda function must handle each of these steps.

Architecture Overview

Simple flow:

  1. Application reads DB credentials from Secrets Manager.

  2. Secrets Manager triggers Lambda on rotation schedule.

  3. Lambda:

    • Generates a new password.

    • Updates the database.

    • Updates the secret value.

Step 1: Create a Secret in AWS Secrets Manager

  1. Goto AWS Secrets Manager.

  2. Click store a new secret.

  3. Choose credential for RDS database.

  4. Enter:

    • Username

    • Password

  5. Choose your Database.
  6. Name the Secret and Finish the setup.

Step 2: Create the Rotation Lambda Function

Create a Lambda function with:

  1. Runtime: Node.js 18+
  2. Role with Permissions to Secrets Manager and Database.

Step 3: Lambda Rotation Function (Node.js Example)

Below is a simplified rotation Lambda example for a MySQL database.

          const AWS = require('aws-sdk');
          const crypto = require('crypto');
          const mysql = require('mysql2/promise');
          
          const secretsManager = new AWS.SecretsManager();
          
          exports.handler = async (event) => {
            const step = event.Step;
            const secretId = event.SecretId;
            const token = event.ClientRequestToken;
            
            console.log(`Rotation step: ${step}`);
            
            switch (step) {
              case "createSecret":
                await createSecret(secretId, token);
                break;
              
              case "setSecret":
                await setSecret(secretId, token);
                break;
              
              case "testSecret":
                await testSecret(secretId, token);
                break;
              
              case "finishSecret":
                await finishSecret(secretId, token);
                break;
              
              default:
                throw new Error("Invalid step");
            }
          };

Step Logic Implementations

1. Create Secret

Generate a new password.

            async function createSecret(secretId, token) {
              const newPassword = crypto.randomBytes(16).toString('hex');
              
              const secret = await secretsManager.getSecretValue({
                SecretId: secretId,
                VersionStage: "AWSCURRENT"
              }).promise();
              
              const currentSecret = JSON.parse(secret.SecretString);
              
              const newSecret = {
                ...currentSecret,
                password: newPassword
              };
              
              await secretsManager.putSecretValue({
                SecretId: secretId,
                ClientRequestToken: token,
                SecretString: JSON.stringify(newSecret),
                VersionStages: ["AWSPENDING"]
              }).promise();
              
              console.log("New secret version created.");
            }

2. Set Secret

Update the database with the new password.

            async function setSecret(secretId, token) {
              const pendingSecret = await secretsManager.getSecretValue({
                SecretId: secretId,
                VersionStage: "AWSPENDING"
              }).promise();
              
              const secret = JSON.parse(pendingSecret.SecretString);
              
              const connection = await mysql.createConnection({
                host: secret.host,
                user: secret.username,
                password: secret.password,
                database: secret.dbname
              });
              
              await connection.execute(
                `ALTER USER '${secret.username}'@'%' IDENTIFIED BY '${secret.password}'`
              );
              
              await connection.end();
              
              console.log("Database password updated.");
            }

3. Test Secret

Verify the new credentials work.

              async function testSecret(secretId, token) {
                const pendingSecret = await secretsManager.getSecretValue({
                  SecretId: secretId,
                  VersionStage: "AWSPENDING"
                }).promise();
                
                const secret = JSON.parse(pendingSecret.SecretString);
                
                const connection = await mysql.createConnection({
                  host: secret.host,
                  user: secret.username,
                  password: secret.password,
                  database: secret.dbname
                });
                
                await connection.execute("SELECT 1");
                await connection.end();
                
                console.log("New credentials verified.");
              }

4. Finish Secret

Promote the new version.

              async function finishSecret(secretId, token) {
                await secretsManager.updateSecretVersionStage({
                  SecretId: secretId,
                  VersionStage: "AWSCURRENT",
                  MoveToVersionId: token
                }).promise();
                
                console.log("Secret rotation completed.");
              }

Step 4: Enable Rotation in Secrets Manager

  1. Open your secret.

  2. Click Enable rotation.

  3. Choose:

    • Rotation Lambda: your function.

    • Rotation schedule: e.g., every 30 days.

AWS will now automatically rotate the secret.

Step 5: Test the Rotation

Trigger rotation manually:

  1. Go to Secrets Manager.

  2. Select your secret.

  3. Click Rotate secret immediately.

Then:

  • Check Lambda logs in CloudWatch.

  • Confirm database password updated.

  • Confirm new secret version marked as AWSCURRENT.

Best Practices for Secret Rotation

1. Use Least Privilege IAM Roles

Your Lambda should only have access to:

  • The specific secret

  • The specific database

2. Use Secure Password Generation

Always use crypto.randomBytes() instead of hardcoded values.

3. Monitor Rotation Failures

Set CloudWatch alarms for:

  • Lambda errors

  • Rotation failures

4. Test Rotation in Non-Production First

Always validate rotation in a staging environment.

Common Beginner Mistakes

  • Forgetting to test the new credentials.

  • Not updating database permissions properly.

  • Using overly broad IAM roles.

  • Ignoring rotation logs.

  • Not verifying the AWSCURRENT stage.

Conclusion

Secret rotation is one of the simplest and most effective ways to improve your application’s security posture. With AWS Secrets Manager and Lambda, you can automate the entire process without manual intervention.

Do not treat secrets as static values. Treat them as short-lived credentials that should be rotated automatically.

Tuesday, December 2, 2025

Managing AWS Lambda Functions: Monitoring, Logging, and Debugging

Managing AWS Lambda Functions: Monitoring, Logging, and Debugging

Serverless applications simplify deployment, scaling, and infrastructure management. But when something goes wrong inside an AWS Lambda function, many beginners quickly realize that debugging a serverless workload is very different from debugging a traditional server.

There is no SSH access.
There is no long-running process to inspect.
Everything depends on good logging, solid monitoring, and smart debugging workflows.

This guide walks through how to effectively monitor, log, and debug AWS Lambda functions using Amazon CloudWatch, CloudWatch Metrics, Lambda Insights, AWS X-Ray, and practical Node.js code snippets. It is written for beginners who want to build confidence in managing serverless workloads.

Debugging Serverless Functions Feels Different

Traditional servers allow direct access to logs, processes, and system internals. Lambda does not. Instead, you rely entirely on the following:

  • CloudWatch Logs for log output

  • CloudWatch Metrics for performance and error indicators

  • Lambda Insights for deep runtime metrics

  • AWS X-Ray for tracing execution

  • Structured debugging practices

Once you understand these tools, troubleshooting becomes much easier and more predictable.

1. Logging in AWS Lambda

Logging is the foundation of all Lambda debugging. Every invocation automatically produces a log stream in Amazon CloudWatch.

Let’s start with clean, structured logging in Node.js.

Structured Logging in Node.js

    exports.handler = async (event) => {
      console.log(JSON.stringify({
        level: "INFO",
        message: "Lambda invoked",
        input: event
      }));

      try {
        const result = await processData(event);

        console.log(JSON.stringify({
          level: "INFO",
          message: "Processing succeeded",
          result
        }));

        return {
          statusCode: 200,
          body: JSON.stringify({ message: "Success" })
        };

      } catch (error) {
        console.error(JSON.stringify({
          level: "ERROR",
          message: "Processing failed",
          error: error.message,
          stack: error.stack
        }));
        throw error;
        }
      };

      async function processData(event) {
      if (!event.value) {
        throw new Error("Missing 'value' in event payload");
      }
      return `Processed: ${event.value}`;
    }

Structured logs help beginners quickly filter and search log entries inside CloudWatch, which is extremely important as applications grow.

2. Using CloudWatch Logs Effectively

Each Lambda invocation creates a log entry under:

/aws/lambda/<your-function-name>

Inside CloudWatch Logs, you can:

  • Search for specific text

  • Filter errors

  • View stack traces

  • Identify unusual behaviors

Log Retention

By default, CloudWatch Logs are kept forever. This can cause unnecessary costs.

You can set retention in the CloudWatch console or via CLI:

    aws logs put-retention-policy \
    --log-group-name "/aws/lambda/my-function" \
    --retention-in-days 14

3. Monitoring Lambda with CloudWatch Metrics

CloudWatch Metrics provides useful aggregated data:

  • Invocation count

  • Errors

  • Duration (average, p90, p99)

  • Throttling events

  • Concurrent executions

  • Cold start indicators via “Init Duration”

These metrics help identify:

  • Performance problems

  • Scaling issues

  • Increasing error rates

  • Dependency bottlenecks

For example:

  • High duration may indicate heavy computation or slow downstream services.

  • High error count indicates code or input issues.

  • Duration spikes with “Init Duration” entries in logs typically imply cold starts.

4. Using Lambda Insights

CloudWatch Lambda Insights provides deeper insights such as:

  • Memory consumed per invocation

  • CPU usage

  • Cold start frequency

  • Network usage

  • Runtime performance anomalies

You can enable it directly from the Lambda console under Monitoring Tools.

Lambda Insights is especially helpful for beginners because it clearly shows whether memory, CPU, or cold starts are the root cause of performance issues.

5. Understanding and Reducing Cold Starts

Cold starts happen when AWS needs to initialize a new runtime environment for your Lambda function. It involves:

  • Downloading your function code

  • Initializing the runtime

  • Running your global initialization code

Cold starts show up in CloudWatch Logs with "INIT_START" and "INIT_DURATION".

How to reduce cold starts

  1. Keep your deployment package small

  2. Increase memory allocation

  3. Avoid heavy initialization in the global scope

  4. Use Provisioned Concurrency

  5. Use lightweight dependencies

6. Tracing with AWS X-Ray

AWS X-Ray provides a complete view of how your Lambda interacts with AWS services. It is extremely valuable for debugging issues such as:

  • Slow DynamoDB queries

  • Timeouts calling third-party APIs

  • Slow Lambda initialization

  • Bottlenecks in downstream services

Enabling X-Ray

Lambda Console → Configuration → Monitoring → Active tracing

Debugging Workflow

Here is a structured workflow that helps beginners debug Lambda issues efficiently.

Step 1: Review CloudWatch Logs

Look for:

  • Errors

  • Stack traces

  • Validation failures

  • Missing environment variables

  • Initialization delays

Step 2: Reproduce the issue locally

Use the failing event payload to reproduce the bug.

Step 3: Improve logging

If logs are insufficient, add structured logs around:

  • External API calls

  • Data transformations

  • Conditional logic

  • Error handling

Step 4: Use X-Ray to identify latency

Check whether the delay comes from:

  • AWS service calls

  • Third-party APIs

  • Internal code execution

  • Cold starts

Step 5: Fix and redeploy

Make incremental changes and test each one.

Step 6: Validate through metrics

Review CloudWatch Metrics to ensure:

  • Errors are gone

  • Duration is stable

  • Concurrency behaves as expected

Common Beginner Mistakes

  • Logging too much or too little

  • Not handling errors gracefully

  • Ignoring log retention settings

  • Forgetting about cold starts

  • Overusing synchronous external calls

  • Not validating event payloads

Avoiding these mistakes significantly improves the reliability of Lambda applications.

Conclusion: The Takeaway

Managing AWS Lambda functions effectively requires a combination of good logging, proper monitoring, and a reliable debugging workflow. Once you become comfortable using CloudWatch Logs, CloudWatch Metrics, Lambda Insights, and X-Ray together, serverless debugging becomes far less intimidating.

Start with clear logs, build systematic debugging habits, and focus on understanding how Lambda interacts with other AWS services. Over time, these practices will help you build more reliable, scalable, and maintainable serverless applications.

Sunday, April 6, 2025

Automating Serverless Workflows with AWS Step Functions: A Beginner's Guide

Automating Serverless Workflows with AWS Step Functions: A Beginner's Guide

AWS Step Functions—a service that allows you to coordinate and chain multiple AWS services into serverless workflows. This blog is a beginner-friendly guide to understanding how to automate serverless workflows using AWS Step Functions, and we'll explore the concept through a simple but powerful Order Processing use case.

Need of AWS Step Functions

In serverless applications, you often need to chain several Lambda functions together to complete a task—such as processing orders, approving requests, or transforming data. Traditionally, you’d handle this orchestration in code, which can quickly become a maintenance headache.

AWS Step Functions let's you:

  • Visually design workflows as state machines

  • Handle retries, timeouts, and errors gracefully

  • Easily integrate with other AWS services

  • Monitor and debug workflows using the AWS Console

Use Case: Automating Order Processing Workflow

Let’s walk through a simple order processing system using AWS Step Functions and Lambda functions. The steps include:

  1. Receive Order

  2. Validate Payment

  3. Check Inventory

  4. Dispatch Order

  5. Notify Customer

Each step is implemented as an AWS Lambda function written in Node.js.

Step 1: Create the Lambda Functions

You’ll need five basic Lambda functions. Here’s a quick overview:

1. Receive Order

exports.handler = async (event) => {
  console.log("Order received:", event);
  return { orderId: event.orderId, status: "RECEIVED" };
};

2. Validate Payment

exports.handler = async (event) => {
  console.log("Validating payment for:", event.orderId);
  // Assume payment is valid
  return { ...event, paymentStatus: "VALID" };
};

3. Check Inventory

exports.handler = async (event) => {
  console.log("Checking inventory for:", event.orderId);
  // Assume inventory is available
  return { ...event, inventoryStatus: "AVAILABLE" };
};

4. Dispatch Order

exports.handler = async (event) => {
  console.log("Dispatching order:", event.orderId);
  return { ...event, dispatchStatus: "DISPATCHED" };
};

5. Notify Customer

exports.handler = async (event) => {
  console.log("Notifying customer for order:", event.orderId);
  return { ...event, notification: "SENT" };
};

Step 2: Define the State Machine

Next, use Amazon States Language (ASL) to define your workflow. Here’s a simplified version of the definition:

{
  "StartAt": "ReceiveOrder",
  "States": {
    "ReceiveOrder": {
      "Type": "Task",
      "Resource": "arn:aws:lambda:REGION:ACCOUNT_ID:function:ReceiveOrder",
      "Next": "ValidatePayment"
    },
    "ValidatePayment": {
      "Type": "Task",
      "Resource": "arn:aws:lambda:REGION:ACCOUNT_ID:function:ValidatePayment",
      "Next": "CheckInventory"
    },
    "CheckInventory": {
      "Type": "Task",
      "Resource": "arn:aws:lambda:REGION:ACCOUNT_ID:function:CheckInventory",
      "Next": "DispatchOrder"
    },
    "DispatchOrder": {
      "Type": "Task",
      "Resource": "arn:aws:lambda:REGION:ACCOUNT_ID:function:DispatchOrder",
      "Next": "NotifyCustomer"
    },
    "NotifyCustomer": {
      "Type": "Task",
      "Resource": "arn:aws:lambda:REGION:ACCOUNT_ID:function:NotifyCustomer",
      "End": true
    }
  }
}       

You can paste this into the Step Functions visual editor, replacing the Lambda ARNs with your own.

Step 3: Deploy with AWS Console or Infrastructure as Code

You can create your Lambda functions and state machine manually using the AWS Console, or automate the deployment using AWS SAM or Terraform. If you’re just starting out, the console method works great for learning.

Step 4: Test the Workflow

Once deployed, you can test the state machine by passing in an input like:

{
  "orderId": "ORDER123"
}

Go to the Step Functions console and view the execution flow. You’ll see each step execute in sequence, with logs from each Lambda function.

Benefits of This Approach

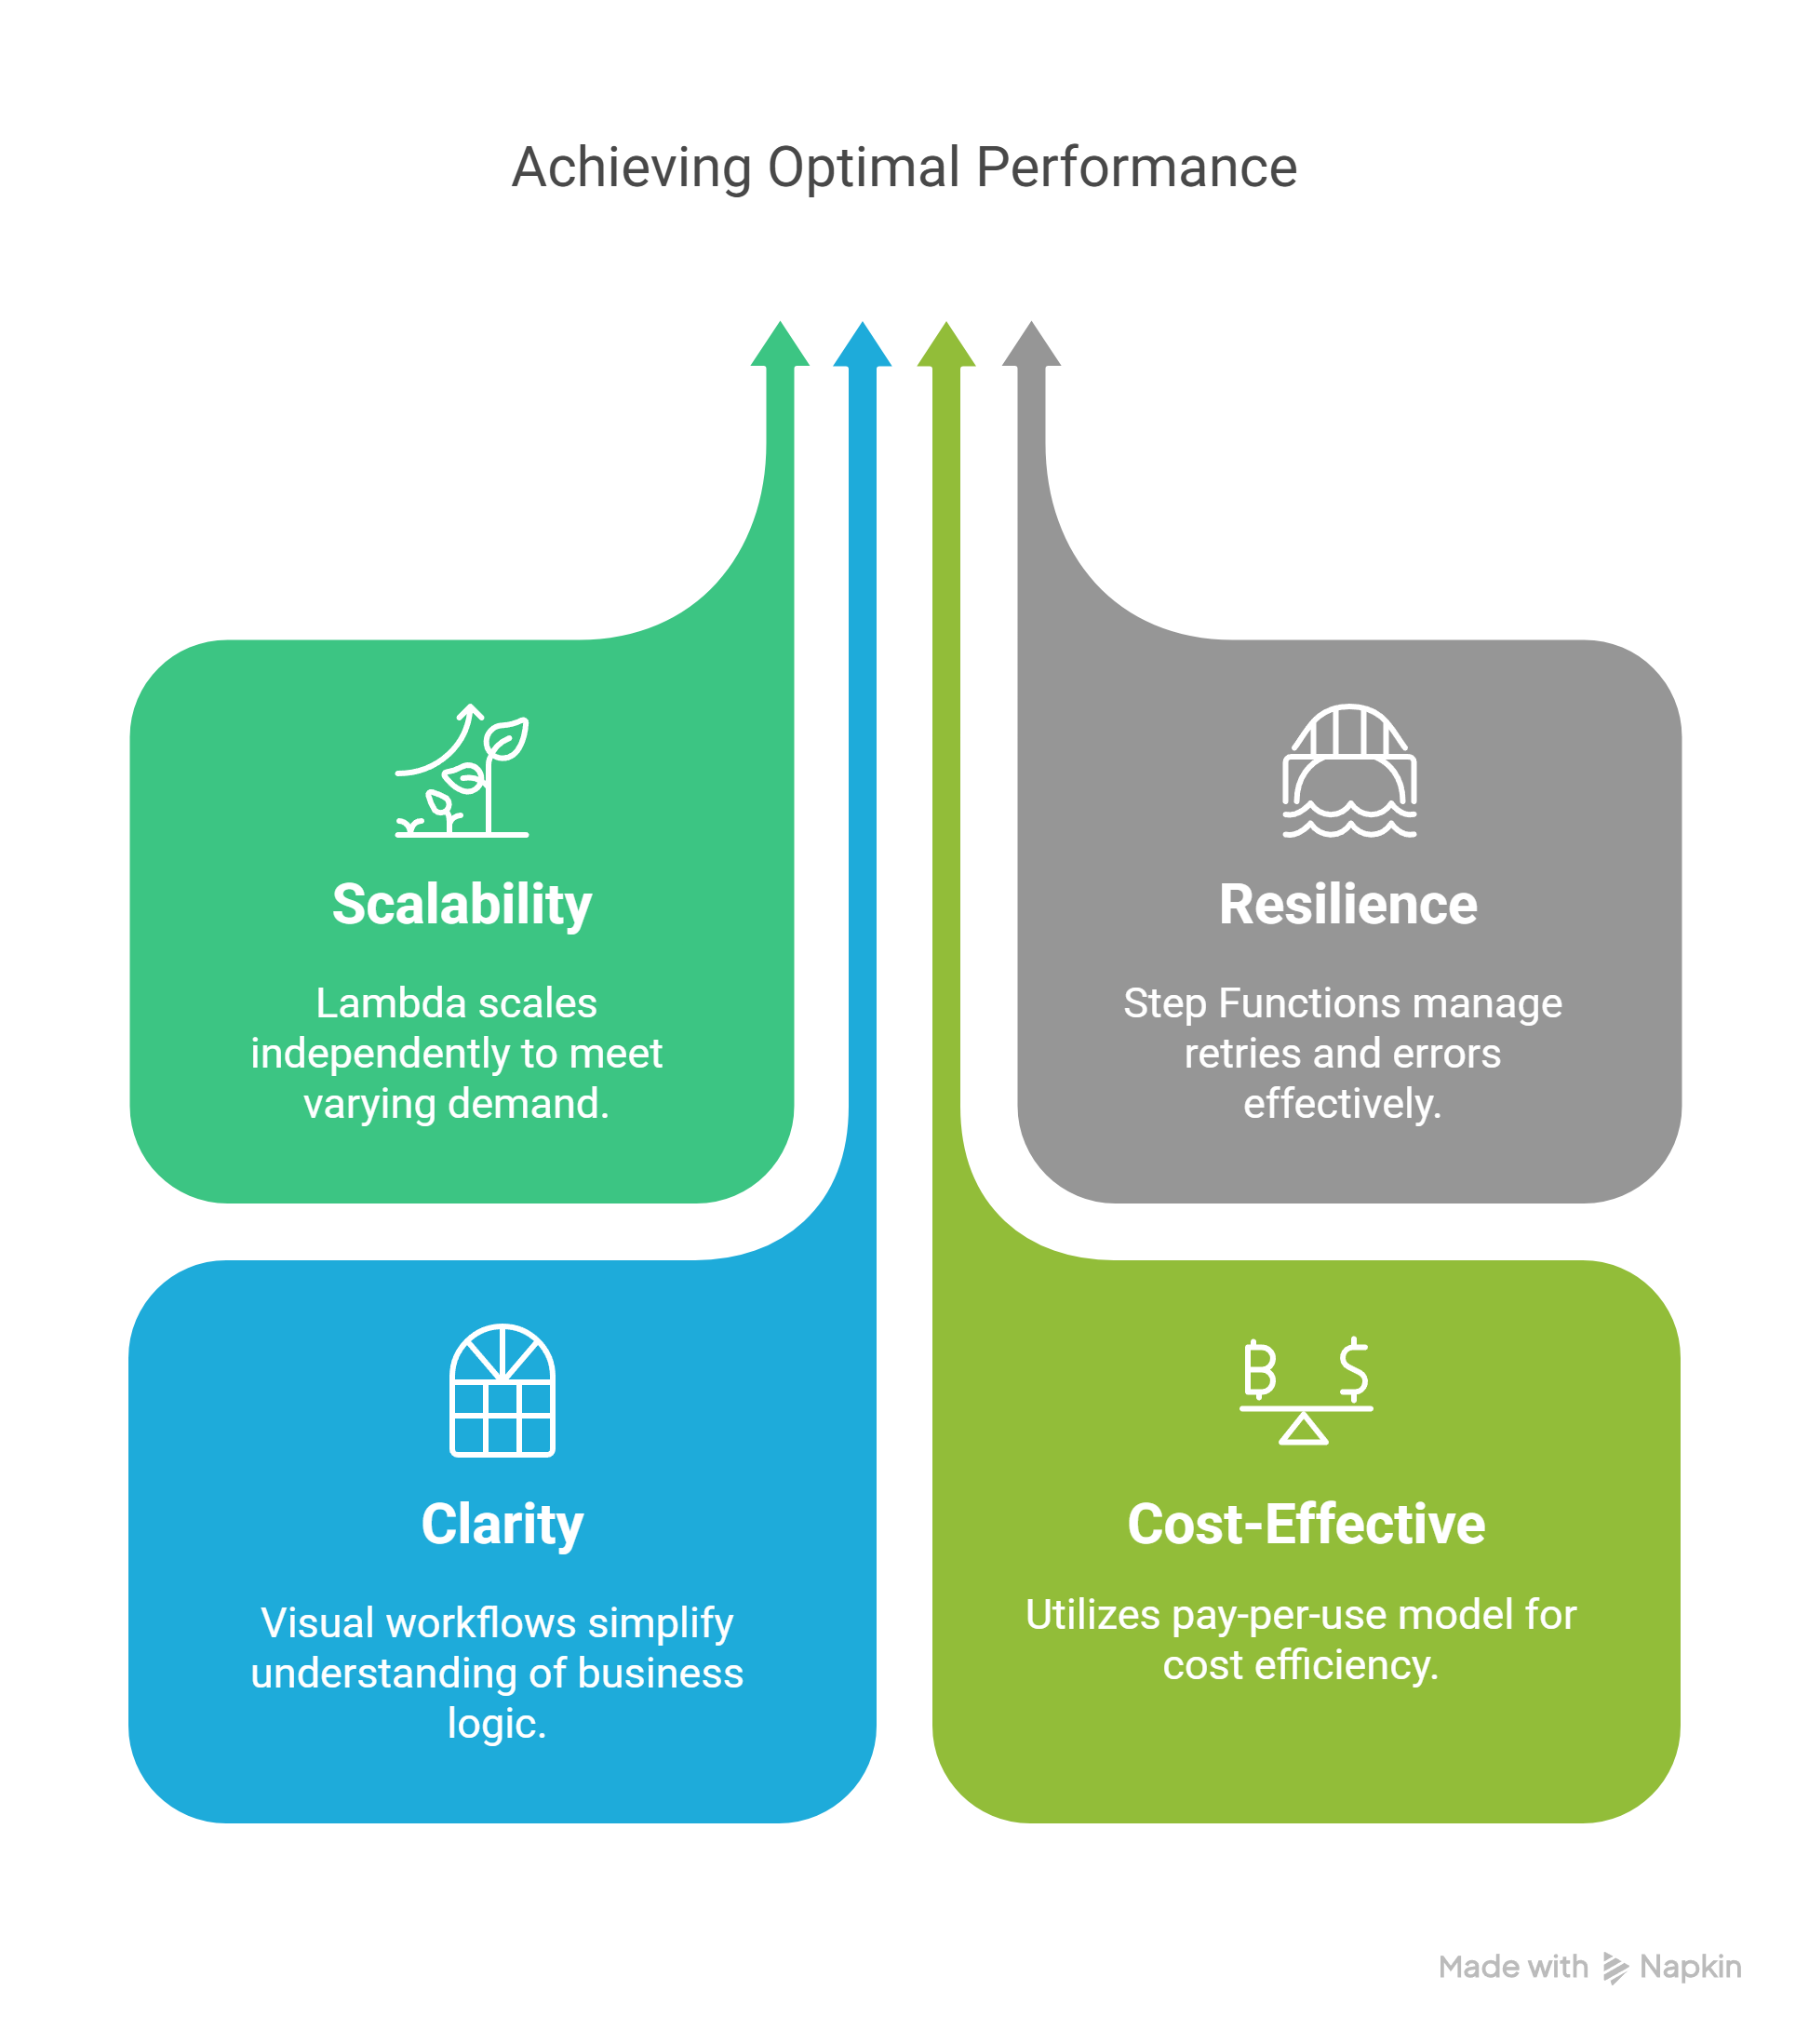
  • Scalability: Each Lambda scales independently based on demand.

  • Resilience: Step Functions handle retries and errors.

  • Clarity: Visual workflow makes understanding business logic easier.

  • Cost-Effective: Pay-per-use pricing model.

Best Practices

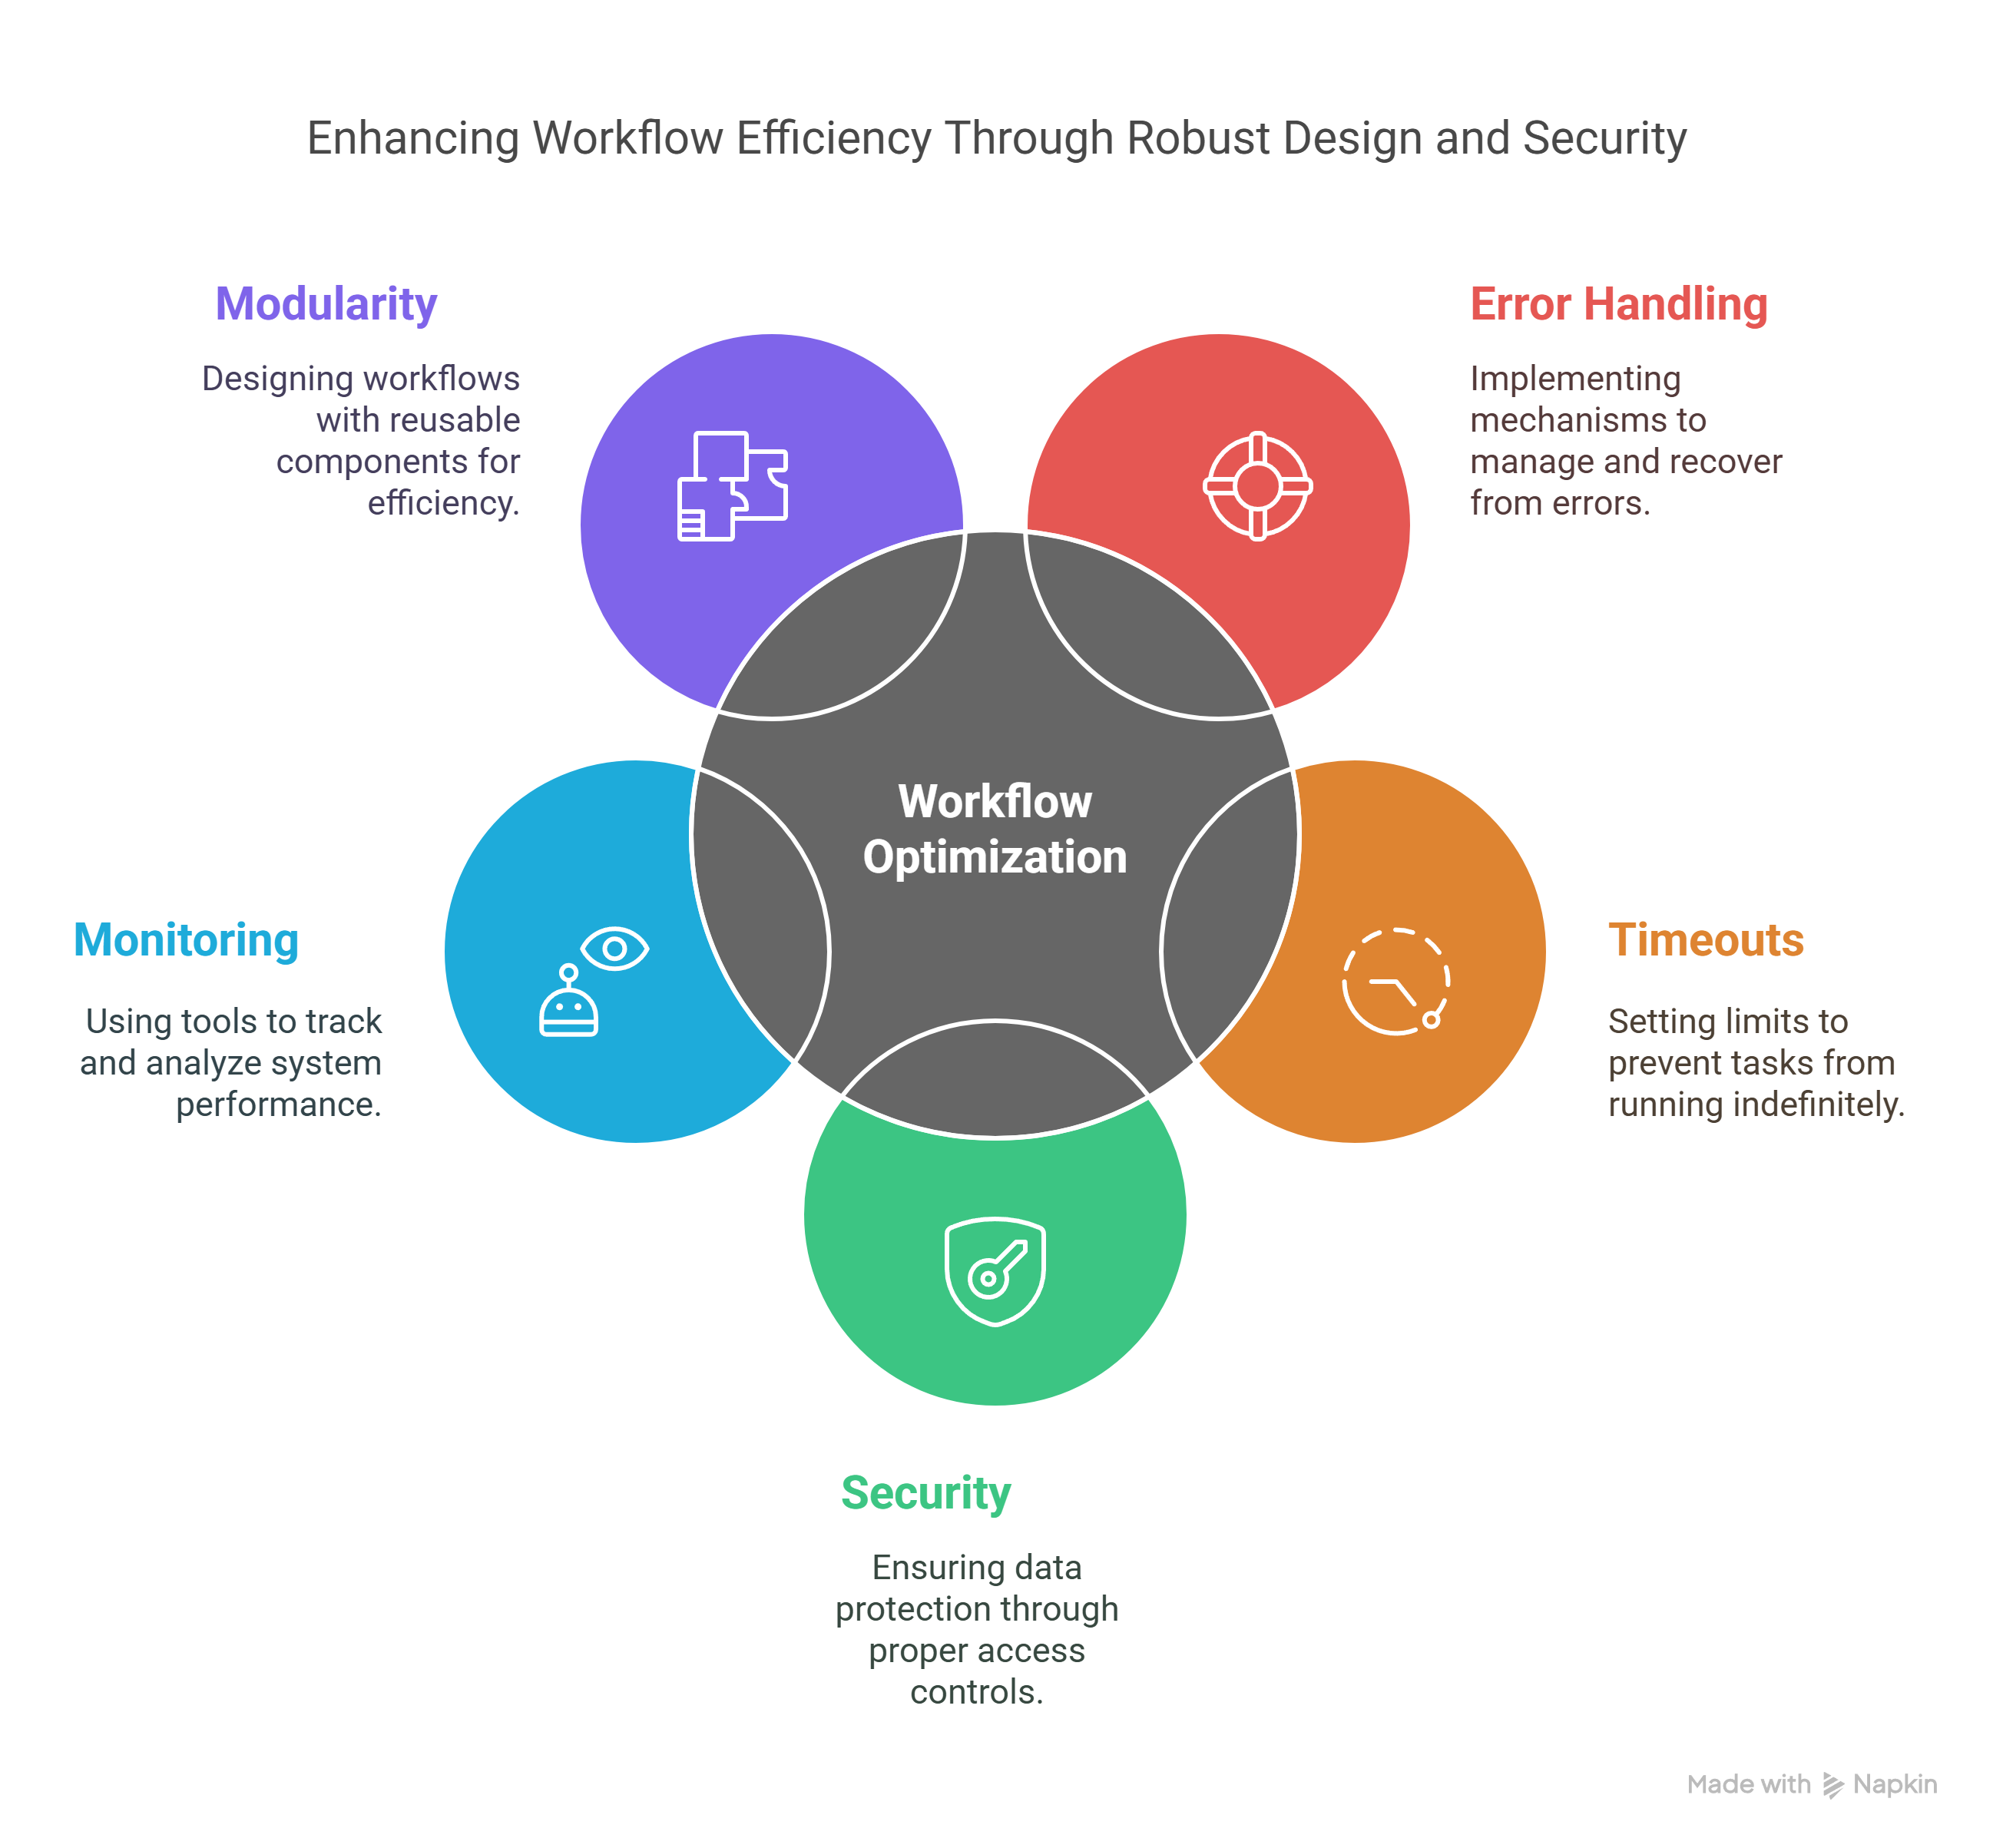
  1. Error Handling: Add Catch and Retry blocks in your state machine to gracefully handle failures.

  2. Timeouts: Define timeouts for long-running tasks.

  3. Security: Use IAM roles with least privilege for Lambda functions.

  4. Monitoring: Leverage CloudWatch Logs and AWS X-Ray for observability.

  5. Modularity: Break down your workflow into reusable Lambda functions.

Wrapping Up

AWS Step Functions are a powerful tool for orchestrating serverless workflows. By combining them with Lambda functions, you can build scalable, maintainable, and robust applications. Our order processing use case just scratches the surface—imagine the workflows you can automate in your own projects!

Ready to automate your backend logic? Give Step Functions a spin and level up your serverless architecture game.

If you enjoyed this blog, share it with your developer friends and let me know how you’re using Step Functions in your projects. Follow for more hands-on AWS content!

#AWS #Serverless #StepFunctions #NodeJS #CloudComputing #Microservices #AWSArchitecture

Sunday, March 9, 2025

Building Scalable Serverless Applications with AWS Step Functions

Building Scalable Serverless Applications with AWS Step Functions

Serverless is all about speed, flexibility, and simplicity—but as your applications grow, so does the complexity of orchestrating them. That’s where AWS Step Functions step in (pun intended). This powerful orchestration service lets you coordinate multiple AWS services into scalable, fault-tolerant workflows.

In this blog, we'll explore how Step Functions simplify building microservices-based serverless applications. We'll walk through a real-world use case using Node.js, and explain how Step Functions enable you to connect services like AWS Lambda, DynamoDB, and more, in a clean, maintainable way.

Role of AWS Step Functions in Serverless Architecture

When you're building serverless applications, AWS Lambda is often the star of the show. But what happens when you need to coordinate multiple Lambda functions, wait for external events, or handle retries and failures gracefully?

You could manage this in code, but that quickly becomes complex and hard to maintain. Enter AWS Step Functions: a visual workflow service that helps you stitch together serverless components with ease.

Key Benefits of Step Functions:

  • Visual Workflows: See and understand your application's flow at a glance.

  • Built-In Error Handling: Automatic retries and catch/finally-like flows.

  • Scalable and Serverless: Automatically scales and integrates seamlessly with AWS services.

  • Easier Debugging: Each step is logged and visualized, making troubleshooting simple.

Use Case: Microservices Coordination with Step Functions

Let’s imagine an e-commerce application that needs to process an order. The process involves:

  1. Validating the payment.

  2. Updating inventory.

  3. Notifying the shipping department.

  4. Sending a confirmation email to the user.

Each of these steps could be handled by a separate microservice, and we’ll use AWS Lambda for each task. Step Functions will be our orchestration engine.

Architecture Overview

  • User places an order (via API Gateway)

  • Step Function is triggered to process the order

  • Each Lambda function performs a single responsibility:

    • validatePayment

    • updateInventory

    • notifyShipping

    • sendConfirmation

We’ll use Step Functions to define this workflow declaratively.

Building the Workflow Step-by-Step

Step 1: Create Lambda Functions (Node.js)

Here are simplified versions of the 4 different Lambda functions you’d deploy:

1. validatePayment.js (Lambda Name: validatePayment)

      exports.handler = async (event) => {
        console.log('Validating payment for order:', event.orderId);
        return { ...event, paymentStatus: 'success' };
      };

2. updateInventory.js (Lambda Name: updateInventory)

      exports.handler = async (event) => {
        console.log('Updating inventory for order:', event.orderId);
        return { ...event, inventoryUpdated: true };
      };    

3. notifyShipping.js (Lambda Name: notifyShipping)

      exports.handler = async (event) => {
        console.log('Notifying shipping for order:', event.orderId);
        return { ...event, shippingNotified: true };
      };    

4. sendConfirmation.js (Lambda Name: sendConfirmation)

      exports.handler = async (event) => {
        console.log('Sending confirmation email for order:', event.orderId);
        return { ...event, emailSent: true };
      };

Step 2: Define the Step Function State Machine

Create a new Step Function in the AWS Console or define it via JSON/YAML:

      {
        "StartAt": "ValidatePayment",
        "States": {
          "ValidatePayment": {
            "Type": "Task",
            "Resource": "arn:aws:lambda:region:account-id:function:validatePayment",
            "Next": "UpdateInventory"
          },
          "UpdateInventory": {
            "Type": "Task",
            "Resource": "arn:aws:lambda:region:account-id:function:updateInventory",
            "Next": "NotifyShipping"
          },
          "NotifyShipping": {
            "Type": "Task",
            "Resource": "arn:aws:lambda:region:account-id:function:notifyShipping",
            "Next": "SendConfirmation"
          },
          "SendConfirmation": {
            "Type": "Task",
            "Resource": "arn:aws:lambda:region:account-id:function:sendConfirmation",
            "End": true
          }
        }
      }
🔐 IAM Permissions: Make sure the Step Function role has permission to invoke the Lambda functions.

Testing the Workflow

You can test your Step Function directly from the AWS Console:

  1. Choose Start Execution.

  2. Provide sample input:

      {
        "orderId": "12345"
      }
  1. Watch the execution flow in real-time.

Each step should complete successfully and pass the output to the next function.

Error Handling and Retries

Step Functions allow you to define Retry and Catch blocks to gracefully handle errors:

      "ValidatePayment": {
        "Type": "Task",
        "Resource": "arn:aws:lambda:...",
        "Retry": [
          {
            "ErrorEquals": ["Lambda.ServiceException"],
            "IntervalSeconds": 2,
            "MaxAttempts": 3
          }
        ],
        "Catch": [
          {
            "ErrorEquals": ["States.ALL"],
            "Next": "FailureHandler"
          }
        ],
        "Next": "UpdateInventory"
      }  

This ensures a more resilient, production-grade workflow.

Monitoring and Observability

AWS Step Functions integrates with Amazon CloudWatch for:

  • Logging execution history

  • Metrics (success, failure, duration)

  • Alerts

You can quickly debug and trace failed executions using the visual console.

Conclusion

AWS Step Functions are a game-changer for serverless architecture. They bring clarity and structure to microservices coordination and help you build scalable, fault-tolerant workflows with minimal effort.

In our e-commerce example, we used Step Functions to handle a complete order processing flow by chaining Lambda functions. With this approach, adding more steps (like fraud detection or customer loyalty points) becomes easy and maintainable.

If you're building on AWS and juggling multiple serverless components, give Step Functions a try. It might just be the missing link in your architecture.

🚀 Bonus Tips

  • Use Amazon States Language for defining complex workflows.

  • Integrate SNS or EventBridge for external event triggers.

  • Combine Step Functions with DynamoDB or SQS for richer use cases.

Have you used AWS Step Functions in your projects? Share your use case or lessons learned in the comments!

#AWS #AWSArchitecture #AWSLambda #AWSStepFunctions #Serverless #Cloud #NodeJS

Sunday, January 12, 2025

Unlocking the Power of Event-Driven Architecture with AWS Lambda and Amazon EventBridge

Unlocking the Power of Event-Driven Architecture with AWS Lambda and Amazon EventBridge

In the modern cloud-native world, event-driven architecture (EDA) is revolutionizing how applications are built and scaled. By responding to events in real time, this paradigm enables developers to build scalable, resilient, and loosely-coupled systems. At the heart of AWS’s event-driven offerings are AWS Lambda and Amazon EventBridge. Together, they empower you to create applications that handle events seamlessly while minimizing operational overhead.

In this blog, we’ll dive into the basics of event-driven architecture, explore AWS Lambda and EventBridge, and create a practical example in Node.js for data processing with disaster recovery.

Introduction to Event-Driven Architecture

Event-driven architecture (EDA) is a design pattern where components in a system communicate by producing and consuming events. Instead of polling or relying on tightly-coupled integrations, events act as triggers for actions, ensuring efficiency and scalability.

Benefits of Event-Driven Architecture:

  1. Scalability: Components only process events when they occur.

  2. Loose Coupling: Producers and consumers of events are independent, making systems easier to maintain.

  3. Real-Time Processing: Respond to events as they happen, enabling immediate action.

  4. Resilience: Events can be stored and retried in case of failures, supporting disaster recovery scenarios.

Core AWS Services for Event-Driven Applications

AWS Lambda

AWS Lambda is a serverless compute service that automatically runs your code in response to events. It supports a variety of triggers, such as API Gateway, DynamoDB streams, and S3 bucket events.

Key Features:

  • Pay only for the execution time (no idle costs).

  • Automatic scaling.

  • Supports multiple languages, including Node.js, Python, and Java.

Amazon EventBridge

EventBridge is a fully managed event bus service that allows you to connect event producers to consumers. It’s designed to work seamlessly with AWS services and third-party SaaS applications.

Key Features:

  • Supports both AWS events (e.g., EC2 state changes) and custom events.

  • Event routing based on rules.

  • Offers features like dead-letter queues (DLQs) and retries for fault tolerance.

Practical Example: Data Processing with Disaster Recovery

Imagine you’re running an application that processes user-uploaded files for analytics. For resiliency, the data processing system should:

  1. Respond to file uploads in real time.

  2. Process the files asynchronously.

  3. Retry failed events and support disaster recovery.

Let’s build this solution using Amazon S3, AWS Lambda, and Amazon EventBridge.

Architecture Overview

  1. A user uploads a file to an S3 bucket.

  2. S3 generates an event, which is routed to EventBridge.

  3. EventBridge triggers a Lambda function to process the file.

  4. Processed data is stored in another S3 bucket.

  5. EventBridge handles retries and disaster recovery using dead-letter queues (DLQs).

Event-Driven File Processing with AWS

Step 1: Set Up Your S3 Buckets

  1. Create two S3 buckets:

    • source-bucket: For user uploads.

    • processed-bucket: For storing processed data.

  2. Enable Event Notifications on the source-bucket to forward events to EventBridge.

Step 2: Create an EventBridge Rule

  1. In the EventBridge Console, create a new rule.

  2. Set the event source to S3 and configure it to match PutObject events from the source-bucket.

  3. Set the target to the Lambda function we’ll create in the next step.

  4. Enable a dead-letter queue (DLQ) to store failed events for later analysis.

Step 3: Write the Lambda Function (Node.js)

The Lambda function will:

  1. Fetch the uploaded file from the source-bucket.

  2. Process the file (in this case, convert it to uppercase as a simple transformation).

  3. Save the processed file to the processed-bucket.

First, install the required AWS SDK package for Node.js:

          npm install @aws-sdk/client-s3

Here’s the Lambda code:

            const { S3Client, GetObjectCommand, PutObjectCommand } = require('@aws-sdk/client-s3');
            const { Readable } = require('stream');
            
            const s3 = new S3Client();
            
            exports.handler = async (event) => {
            try {
              const sourceBucket = event.detail.bucket.name;
              const objectKey = event.detail.object.key;
              const destinationBucket = 'processed-bucket';
              
              // Fetch the uploaded file from source bucket
              const getObjectCommand = new GetObjectCommand({
                Bucket: sourceBucket,
                Key: objectKey,
              });
              const response = await s3.send(getObjectCommand);
              
              // Convert file to uppercase (simple processing)
              const originalText = await streamToString(response.Body);
              const processedText = originalText.toUpperCase();
              
              // Save the processed file to the destination bucket
              const putObjectCommand = new PutObjectCommand({
                Bucket: destinationBucket,
                Key: `processed-${objectKey}`,
                Body: processedText,
              });
              await s3.send(putObjectCommand);
              
              console.log(`Successfully processed and saved ${objectKey}`);
            } catch (error) {
              console.error('Error processing file:', error);
              throw error;
              }
            };
            
            // Helper function to convert stream to string
            const streamToString = (stream) => {
              return new Promise((resolve, reject) => {
                const chunks = [];
                stream.on('data', (chunk) => chunks.push(chunk));
                stream.on('end', () => resolve(Buffer.concat(chunks).toString('utf8')));
                stream.on('error', reject);
              });
            };

Step 4: Deploy the Solution

  1. Create the Lambda Function:

    • Deploy the Node.js code as a ZIP file.

    • Assign an IAM role with S3 read/write permissions and EventBridge execution rights.

  2. Configure EventBridge:

    • Link the EventBridge rule to the Lambda function.

  3. Test the System:

    • Upload a file to the source-bucket.

    • Verify the processed file in the processed-bucket.

Best Practices for Event-Driven Architecture

  1. Enable Monitoring:

    • Use CloudWatch for metrics and logs.

  2. Use Dead-Letter Queues (DLQs):

    • Capture failed events for debugging and disaster recovery.

  3. Optimize Lambda Cold Starts:

    • Use smaller package sizes and provisioned concurrency if necessary.

  4. Secure Resources:

    • Use IAM roles with the least privilege.

  5. Test Event Flows:

    • Simulate events using the EventBridge console to ensure end-to-end functionality.

Best Practices for Event-Driven Architecture

Conclusion

Event-driven architecture with AWS Lambda and Amazon EventBridge offers a powerful way to build scalable, resilient, and cost-effective applications. By combining these services, you can create systems that respond to events in real time and support disaster recovery scenarios with minimal effort.

In this blog, we demonstrated how to process files in an S3 bucket using a serverless approach. Whether you’re building real-time analytics systems, notifications, or automated workflows, event-driven architecture provides a robust foundation.

Ready to explore serverless architectures? Try building your own event-driven solutions and share your experiences! 🚀

Wednesday, December 25, 2024

Understanding Serverless Architecture on AWS: A Beginner's Guide

Understanding Serverless Architecture on AWS: A Beginner's Guide

Serverless architecture has transformed how developers build and deploy applications. With no need to manage infrastructure, developers can focus solely on writing code and delivering business value. AWS, as a leading cloud provider, offers a suite of services tailored for serverless solutions. In this blog, we will explore the fundamentals of serverless architecture, its key components on AWS, and build a practical example using Node.js to resize images—a common use case in real-world applications.

Serverless Architecture

Serverless architecture allows developers to build applications without worrying about provisioning, scaling, or managing servers. Instead of dealing with traditional infrastructure, you rely on managed cloud services to handle compute, storage, and other backend functionalities. With serverless, you only pay for what you use, making it cost-efficient and scalable by default.

Key Benefits of Serverless:

  • Cost Efficiency: Pay only for the execution time of your code, with no idle server costs.

  • Scalability: Automatically scale based on demand.

  • Reduced Operational Overhead: No need to manage servers, patch operating systems, or handle scaling.

  • Faster Development Cycles: Focus on writing code while AWS manages the backend.

Key Benefits of Serverless Architecture

Core AWS Services for Serverless Applications

AWS provides a robust ecosystem for building serverless applications:

  1. AWS Lambda: The compute layer to run your code in response to events.

  2. Amazon API Gateway: Build and manage APIs to interact with your application.

  3. Amazon S3: Scalable storage service for hosting files, such as images and videos.

  4. Amazon DynamoDB: NoSQL database for serverless applications.

  5. AWS Step Functions: Orchestrate workflows across multiple AWS services.

  6. Amazon CloudWatch: Monitor and log your application’s performance.

Core Components of AWS Serverless Architecture

Use Case: Building a Serverless Image Resizing Service

Let’s dive into a practical example where we’ll build a serverless application to resize images. This use case showcases how AWS Lambda, Amazon S3, and Node.js can work together to solve a real-world problem.

Architecture Overview:

  1. Users upload images to an S3 bucket.

  2. An S3 event triggers an AWS Lambda function.

  3. The Lambda function processes the image (resizing it) and stores the resized version in another S3 bucket.

Step-by-Step Guide to Building the Service

Step 1: Set Up Your S3 Buckets

  1. Create two S3 buckets:

    • source-bucket: For uploading the original images.

    • destination-bucket: For storing resized images.

  2. Enable event notifications on the source-bucket to trigger a Lambda function whenever a new object is uploaded.

Step 2: Write the Lambda Function

We’ll use Node.js for our Lambda function. The function will:

  • Fetch the uploaded image from source-bucket.

  • Resize the image using the sharp library.

  • Upload the resized image to destination-bucket.

Install the required Node.js libraries locally:

       npm install sharp @aws-sdk/client-s3

Here’s the code for the Lambda function:

          import { S3Client, GetObjectCommand, PutObjectCommand } from '@aws-sdk/client-s3';
          import sharp from 'sharp';
          
          const s3 = new S3Client();
          
          export const handler = async (event) => {
            try {
              // Extract bucket and object key from the event
              const sourceBucket = event.Records[0].s3.bucket.name;
              const objectKey = event.Records[0].s3.object.key;
              // Replace with your destination bucket name
              const destinationBucket = 'destination-bucket'; 
              
              // Get the image from the source bucket
              const getObjectCommand = new GetObjectCommand({
                Bucket: sourceBucket,
                Key: objectKey,
              });
              const imageResponse = await s3.send(getObjectCommand);
              
              // Read the image body
              const imageBuffer = await imageResponse.Body.transformToByteArray();
              
              // Resize the image using sharp
              const resizedImage = await sharp(imageBuffer)
                .resize(300, 300) // Resize to 300x300
                .toBuffer();
              
              // Upload the resized image to the destination bucket
              const putObjectCommand = new PutObjectCommand({
                Bucket: destinationBucket,
                Key: `resized-${objectKey}`,
                Body: resizedImage,
                ContentType: 'image/jpeg',
              });
              await s3.send(putObjectCommand);
              
              console.log(`Successfully resized and uploaded ${objectKey}`);
              } catch (error) {
                console.error('Error processing image:', error);
                throw error;
            }
          };

Step 3: Deploy the Lambda Function

  1. Create a Lambda function in the AWS Management Console.

  2. Upload the Node.js code as a .zip file.

  3. Assign the function an IAM role with the necessary permissions to:

    • Read from source-bucket.

    • Write to destination-bucket.

Step 4: Configure the Event Trigger

In the S3 source-bucket settings, configure an event notification to trigger the Lambda function whenever an object is created.

Step 5: Test the Application

  1. Upload an image to the source-bucket.

  2. Verify that the resized image appears in the destination-bucket.

  3. Check the CloudWatch logs for detailed logs of the Lambda function’s execution.

Best Practices for Serverless Applications

  1. Optimize Cold Starts: Use smaller Lambda packages and keep the runtime lightweight.

  2. Secure Secrets: Use AWS Secrets Manager to securely store API keys and credentials.

  3. Enable Monitoring: Use Amazon CloudWatch to track metrics and set alarms for performance issues.

  4. Use IAM Policies: Grant least privilege permissions to Lambda functions and other resources.

  5. Leverage Infrastructure as Code (IaC): Use tools like AWS CloudFormation or Terraform to manage serverless resources programmatically.

Best Practices for Serverless Applications

Conclusion

Serverless architecture is a game-changer for developers looking to build scalable, cost-effective applications without managing infrastructure. By leveraging services like AWS Lambda and S3, we’ve demonstrated how easy it is to create a real-world image resizing service. With the right practices and tools, you can unlock the full potential of serverless applications on AWS.

Are you ready to go serverless? Start exploring AWS’s serverless ecosystem and share your experiences in the comments below!

#AWS #Serverless #Lambda #CloudComputing #NodeJS